Yoga is an ancient practice that has been around for thousands of years, originating in India. It involves physical postures, breathing techniques, and meditation to promote overall health and well-being. ...
-
April 6, 2023 -
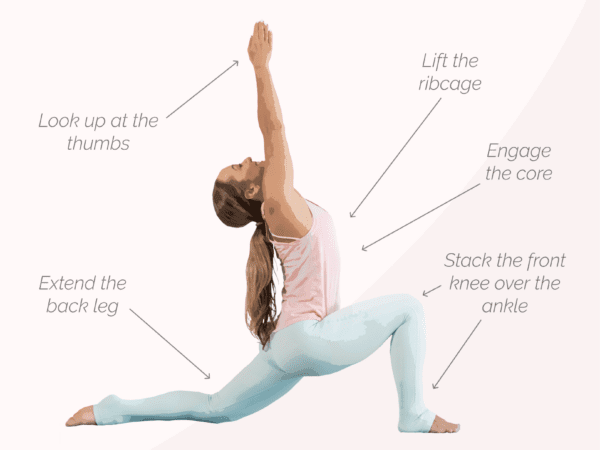
July 28, 2022 How to do Low Lunge (Anjaneyasana)
-
June 16, 2022 How to do Parivrtta Surya Yantrasana (Compass Pose)
-
June 9, 2022 How to do Tittibhasana (Firefly Pose)
-
June 2, 2022 How to do Upavistha Konasana (Wide Legged Seated Forward Fold)
-
May 19, 2022 How to Do Pigeon Pose for Beginners (Eka Pada Rajakapotasana)
-
April 21, 2022 How to do Adho Mukha Shvanasana (Downward Facing Dog)
-
March 10, 2022 How to do Pasasana (Noose Pose)
-
February 3, 2022 How to do Hanumanasana (Yoga Splits)
-
January 27, 2022 How to do Simple Bridge Pose