Do you want to learn how to do eka pada rajakapotasana? This yoga pose is also known as pigeon pose. It is a great pose for stretching the hips and thighs. It comes at the end of the third series in Ashtanga yoga, so that should let you know that it’s a pretty advanced pose. The benefits of this pose include improved flexibility, better circulation, and reduced stress. Let’s take a look at how to do this pose step by step!
Benefits of Eka Pada Rajakapotasana
Pigeon pose has many benefits, including:
- opening the chest
- stretching the shoulders
- releasing the hip and groin
- eases sciatica and low back pain
- improves overall flexibility
- reduces stress.
Contraindications for Eka Pada Rajakapotasana
If you have any hip or knee injuries you should avoid this pose or modify it, so it doesn’t aggravate your injury. If you have previous health conditions, please consult your doctor before attempting this pose.
Step by Step Instructions for Eka Pada Rajakapotasana
Before we start make sure you warm up and that you are in a season in your practice where this pose is appropriate for you to try. You don’t want to twist your body in ways that could be damaging if you’re not ready.
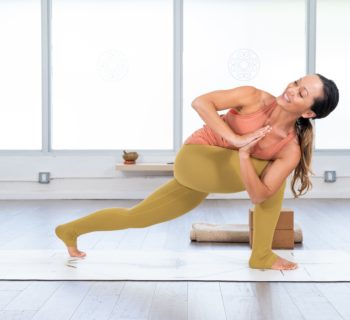
Start in downward dog. Guide your right knee forward and settle the hips down so you’re in a half split. Your front knee is bent.
If your left hip is popping up off the ground you’ll need to work on opening your hips before you continue.
Inhale and lift the ribs away from the hips coming into a backbend.
Raise your arms over your head.
Bend your right knee, bringing your foot up.
Catch your right foot with your hands, holding the top of the foot. If you have the flexibility to grab your ankle do that.
Exhale and drop your head back.
Slowly release the pose and repeat it on the other side.
Watch this class with Kino for more detail about how to do the pose.
Start your Omstars membership today to get expert guidance for your at-home yoga practice.