In the traditional Ashtanga yoga practice, there are 3 variations of the unsupported headstand. Today we’ll be covering the most popular version. Mukta Hasta Sirsasana A is commonly known as the Tripod Headstand. This is a really important posture for building strength in alignment in your shoulders and in the centerline of your body.
This pose will be easier for you if your shoulders are strong. In all headstands, you want to find the centerline alignment. That means your pelvis is stacked over your chest, and your chest is stacked over your head. Everything must be balanced in the centerline.
When you do this pose, the flattest part of your head, the very top of it is on the ground. When you have your head in the right position on the floor you should feel no tension in your neck muscles.
To begin your journey into this headstand, you have to stabilize the shoulders while lifting your body up into the centerline. The ideal way to come up is to activate the deep muscles of the low belly.
Let’s practice doing the first version of Mukta Hasta Sirsasana A. Kneel on the ground and put your hands on the floor in front of your shoulder-width apart. Your elbows will bend in line with your wrists and shoulders to place the top of your head on the ground. You’re making an equilateral triangle shape with your head and hands.
Now that your head is on the ground come up onto your feet and straighten your legs. Walk your legs in as close to your hands as you can. This is the first version of the pose.
If you feel like you’re ready to move deeper into the pose, you can come into a tripod egg shape from there by sending your hips forward and up so you can come up onto your toes. Bend one leg and place it on the top of the tricep of the arm on the same side. Don’t let it sink down, but press and squeeze it up. Now bring your other leg up with your knee on your tricep. Balance here.
If you feel comfortable here, pull both knees up and in so they are off your triceps and bent, floating against the front of your body. Keep your shoulders strong. Stay balanced on the centerline. If this stage of the pose feels good to you, you’re ready to take it further.
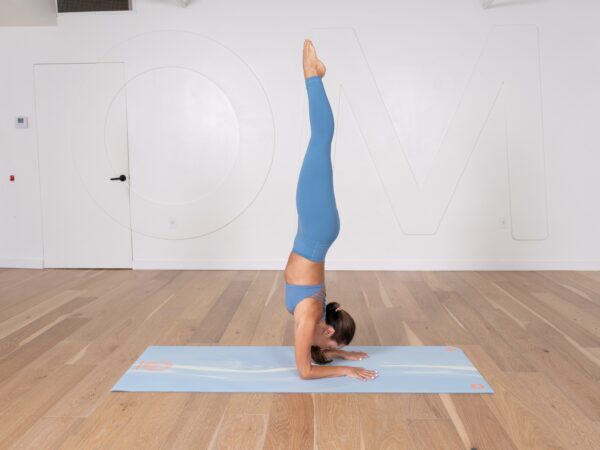
Now straighten your legs up over your head. Find your centerline, so your legs are over your hips, your hips are over your chest, and your chest is over your head. Your shoulders and arms are strong. Your core is activated. Press the bases of the big toes together. Pull the ribs in. Activate the transverse abdominals. Open the shoulders while continuing to get them active.
When you’re ready to come down, slowly bend your legs back down to your triceps like you started out in the tripod egg shape. Then put your feet back on the ground and slowly come out of the pose.
Once you’re comfortable doing this version of the pose, you’re ready to enter the pose in the traditional way. To do that, put your hands and head on the ground. Remember that you’re making an equilateral triangle shape here. Walk your legs forward. Bring them close to the body. Suck your belly in. Spiral your elbows in. Roll the hips forward, pulling the thighs close to the body. Engage your pelvic floor and send the hips forward. When you reach the halfway point where your hips are beyond the vertical axis, slowly tuck the tailbone as you open the front of your hips. Lift the legs straight up into the air. Lift the kneecaps. Tuck the tailbone slightly, pull the ribs in and activate the transverse abdominals. Stay here for five breaths.
To come out of the pose, suck the belly in and roll through the hip joints as you slowly bring your feet back to the floor.
Watch this video with Kino for more details about doing Mukta Hasta Sirsasana A.