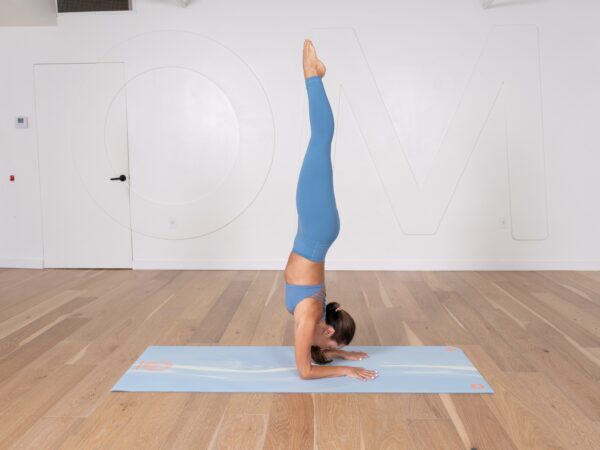
Plank is one of the fundamental yoga positions that can help build strength and stability in the core, arms, and legs. It is a simple yet challenging posture that requires proper alignment and engagement of the muscles. Whether you are a beginner or an experienced yoga practitioner, mastering the plank can benefit your practice in numerous ways. In this guide, we will walk you through step-by-step on how to do plank correctly and the benefits it can bring to your yoga practice. Get ready to sweat and feel your muscles working!
What are the benefits of doing a plank?
Plank involves holding a push-up position for a certain amount of time, with the body in a straight line from head to heels. While this may seem like a simple exercise, it can provide numerous benefits. Here are some of the benefits of doing a plank:
1. Strengthens core muscles: Plank engages the abdominal muscles, lower back muscles, and the muscles around the pelvis. This helps to build core strength and stability, which can improve posture and reduce the risk of back pain.
2. Improves balance and stability: Plank requires the body to maintain a straight line from head to heels, which can improve balance and stability. This can also be beneficial for other yoga poses that require balance and stability.
3. Increases overall body strength: Plank is a full-body workout that engages the arms, shoulders, chest, and legs. This can help to build overall body strength and improve endurance.
4. Boosts metabolism: Holding a plank position can increase the heart rate and boost metabolism. This can help to burn calories and improve overall fitness.
Overall, doing a plank regularly can provide numerous benefits to yoga students. It can help to strengthen the core muscles, improve balance and stability, increase overall body strength, enhance flexibility, and boost metabolism.
Contraindication for plank
While plank is a safe and effective yoga pose for most people, there are some contraindications to keep in mind. Here are some situations where you should avoid doing plank or modify the pose:
1. Wrist injuries: Plank requires you to support your weight on your hands and wrists, which can be challenging if you have a wrist injury. If you experience pain or discomfort in your wrists when doing a traditional plank, you can modify the pose by doing forearm plank instead.
2. Shoulder injuries: Plank can put strain on the shoulders, especially if you have a shoulder injury or weakness. If you experience pain or discomfort in your shoulders when doing plank, you can modify the pose by doing a supported plank or using yoga blocks to reduce the load on your shoulders.
3. Low back pain: Plank can be challenging for people with low back pain, especially if you have a weak core or poor posture. If you experience pain or discomfort in your lower back when doing plank, you can modify the pose by doing knee plank or using yoga blocks to reduce the load on your back.
4. High blood pressure: Plank can increase blood pressure and heart rate, so it may not be suitable for people with high blood pressure. If you have high blood pressure, you should talk to your doctor before doing plank and monitor your blood pressure during the pose.
Overall, if you have any injuries or medical conditions, you should consult with your doctor or a qualified yoga teacher before doing plank.
Step-by-step instructions how to do plank
1. Begin by coming onto your hands and knees on your yoga mat. Place your palms on the ground directly under your shoulders and spread your fingers wide apart.
2. Step your feet back one at a time, coming into a high plank position. Make sure that your body is in a straight line from your head to your heels.
3. Engage your abdominal muscles and draw your navel in towards your spine. Keep your shoulders away from your ears. Don’t squeeze your shoulder blades together. Instead, keep them wide on your back. Your neck is in a neutral position.
4. Hold the pose for 30 seconds to 1 minute, breathing deeply and evenly.
5. To release the pose, lower your knees to the mat and come back into a tabletop position.
Watch this video with Kino for more instructions about doing plank.
Remember to listen to your body and modify the pose as needed. If you experience pain or discomfort in any part of your body, come out of the pose immediately.
Incorporating plank into your yoga practice can provide numerous benefits, so try to do the pose regularly and watch as your strength and flexibility improve over time.
How long should I hold a plank for?
As a yoga student, you may be wondering how long you should hold a plank for during your practice. The answer is not straightforward, as it depends on your individual fitness level and goals.
Beginners may start with holding a plank for 10-15 seconds, gradually increasing the time as they build strength and endurance. Intermediate and advanced practitioners may aim for 30-60 seconds or longer.
It’s important to maintain proper form during a plank, even if it means holding the position for a shorter amount of time. Keep your shoulders, hips, and heels in a straight line, engage your core and glutes, and avoid sagging or arching the lower back.
Benefits of holding a plank include strengthening the core, improving posture, reducing back pain, and enhancing overall stability. Remember to listen to your body and
consult with a yoga instructor if you have any concerns or questions about your plank practice.
Are there any modifications I can do to make plank easier?
Absolutely! There are several modifications you can do to make the plank easier, especially if you’re just starting out or if you have any injuries or conditions that make it difficult to hold the pose.
Here are some modifications to try:
1. Start with a modified plank: Instead of holding your body straight, start on your knees and lower legs. Your arms should be straight and shoulder-width apart. Keep your core engaged and your body in a straight line from your head to your knees.
2. Use props: You can use props like yoga blocks to help support your body while you’re holding plank.
3. Shorten the duration: If you find it hard to hold the plank for a long time, try starting with shorter durations and gradually build up as you get stronger.
4. Focus on proper form: Make sure you’re engaging your core muscles and keeping your body in a straight line from your head to your toes. Don’t let your hips sag or your lower back arch.
Remember, it’s important to listen to your body and not push yourself too hard. With practice and patience, you’ll be able to hold the plank pose for longer periods of time and reap its many benefits.
Are there any variations on the plank exercise to make it more challenging?
Yes, there are several variations on the plank exercise that can be adapted to different fitness levels and goals. Some common variations include:
1. Side plank: This variation focuses on the oblique muscles and requires balancing on one arm and the side of one foot, with the hips lifted off the ground.
2. Elevated plank: This variation involves placing the hands or feet on an elevated surface such as a bench or step, which increases the challenge to the core and upper body.
3. Plank jacks: This variation adds a cardio component by jumping the feet in and out while holding the plank position.
4. Spiderman plank: This variation involves bringing the knee of one leg towards the elbow on the same side while holding the plank position, engaging the obliques and hip flexors.
By incorporating variations into your plank practice, you can target different muscle groups, challenge yourself, and prevent boredom.
Is it OK to do a plank every day?
As a yoga student, you may wonder if it’s safe to practice plank every day. The answer is yes, as long as you practice it correctly and listen to your body. Plank is a foundational pose that strengthens your core, arms, and legs, improves your posture, and enhances your overall physical stability. By practicing plank regularly, you can build endurance, flexibility, and balance, which are essential for mastering more challenging yoga poses.
However, it’s important to note that plank can be intense, especially if you’re new to yoga or have an injury. Therefore, it’s recommended to start with shorter holds, such as 10-15 seconds, and gradually increase the duration as your strength and confidence improve. Also, make sure to engage your core muscles, align your wrists under your shoulders, and distribute your weight evenly across your body. Avoid sinking your hips or lifting your buttocks too high, as this can strain your lower back.
If you experience any discomfort or pain during plank, modify the pose or rest for a few breaths. You can also practice variations of plank, such as side plank, forearm plank, or high plank with knee taps, to add variety and challenge to your routine. Remember to breathe deeply and mindfully, and not to hold your breath during the pose.
What should I do to make sure I’m doing a plank safely?
Plank is a great yoga pose that works wonders for your entire body. It strengthens your core muscles, tones your arms and legs, improves posture and balance, and increases endurance. However, it’s important to do plank safely to avoid injury. Here are some tips to ensure that you’re doing plank correctly:
1. Start in the right position. Get into a push-up position with your hands shoulder-width apart, your arms straight, and your feet hip-width apart. Your body should form a straight line from your head to your heels.
2. Engage your core muscles. Tighten your abs, glutes, and thighs to maintain proper form and stability. This will also protect your lower back and prevent it from sagging or arching.
3. Keep your neck neutral. Avoid looking up or down, as this can strain your neck. Instead, look at a spot on the floor about a foot in front of you.
4. Breathe deeply and steadily. Inhale and exhale through your nose, taking slow, deep breaths. This will help you stay focused and calm.
5. Hold the pose for a few seconds. Start with 10-15 seconds and gradually increase as you get stronger. Avoid holding the pose for too long, as this can lead to muscle fatigue and poor form.
6. Release the pose slowly. Lower yourself down to the floor with control rather than collapsing or dropping down quickly.
By following these tips, you can ensure that you’re doing plank safely and effectively. Remember to listen to your body and modify the pose if necessary. Plank can be challenging, but with practice and patience, you’ll be able to hold it for longer and reap the benefits for your mind and body. Next time you practice yoga, incorporate plank into your routine and feel the difference it makes!
Do you need some guidance on your yoga journey? Join Omstars to get access to thousands of on-demand classes and daily LIVE classes. Get started here.