Tree pose, or vrikshasana is a foundation posture in the yoga practice. In this comprehensive guide, we will delve into the intricacies of tree pose to empower you with the knowledge and confidence to incorporate it into your routine. Embrace this opportunity to grow, stabilize, and flourish, just like a tree deeply rooted in the earth yet reaching for the sky. Let’s embark on this transformative journey together!
Benefits of Tree Pose
Tree pose is more than just a physical exercise; it is a holistic practice that nurtures the body, mind, and spirit. Here are some of the remarkable benefits you can experience by incorporating this pose into your yoga routine:
1. Improves Balance and Stability
Tree pose is a quintessential standing balance posture that challenges your ability to maintain equilibrium. By regularly practicing this pose, you enhance your proprioception, which is your body’s ability to sense its position in space. This improvement in balance can translate into better coordination and stability in everyday activities.
2. Strengthens Legs and Core
As you hold tree pose, your standing leg works diligently to support your body weight, thereby strengthening the muscles in your thighs, calves, and ankles. Additionally, engaging your core muscles to maintain balance helps build a strong and stable core, which is essential for overall physical health.
3. Enhances Focus and Concentration
Tree pose requires a calm and focused mind to maintain balance. By concentrating on a fixed point and controlling your breath, you cultivate mental clarity and concentration. This meditative aspect of the pose can help reduce stress and improve your ability to focus in other areas of life.
4. Promotes Mind-Body Connection
Practicing tree pose encourages mindfulness and a deeper connection with your body. As you become more aware of your posture and alignment, you develop a greater appreciation for your body’s capabilities and limitations, fostering a sense of gratitude and self-awareness.
5. Boosts Confidence and Poise
Successfully holding tree pose can instill a sense of accomplishment and confidence. As you master the pose, you may notice an improvement in your posture and poise, both on and off the mat. This newfound confidence can positively impact various aspects of your life.
6. Encourages Patience and Perseverance
Balancing on one leg is no easy feat and requires patience and perseverance. By practicing tree pose regularly, you learn to embrace challenges and setbacks as opportunities for growth, cultivating resilience and determination.
Incorporating tree pose into your yoga practice can lead to a harmonious blend of physical strength, mental clarity, and emotional balance. Embrace the journey of mastering this pose, and watch as it transforms not only your yoga practice but also your approach to life.
Contraindications for Tree Pose
While tree pose offers numerous benefits, it’s essential to approach it with mindfulness and awareness of any physical limitations or health conditions. Here are some contraindications to consider before practicing tree pose:
1. Knee or Ankle Injuries
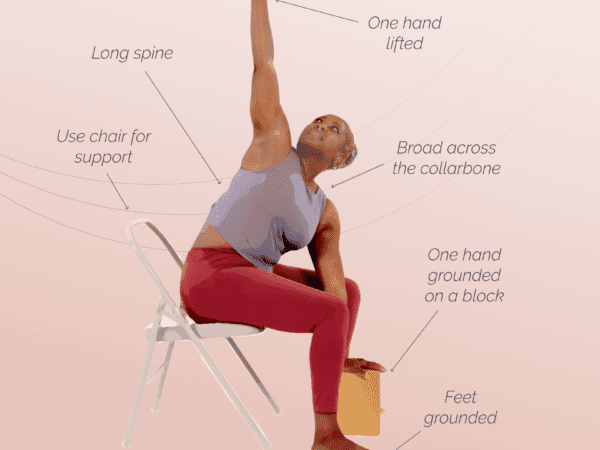
If you have a recent or chronic injury in your knees or ankles, it’s advisable to avoid tree pose or modify it to prevent further strain. Consider practicing with the support of a wall or chair to reduce pressure on these joints.
2. Hip Issues
Individuals with hip problems should exercise caution when performing tree pose. Ensure that you do not force the lifted leg into a position that causes discomfort or pain. Modifications, such as placing the foot lower on the standing leg, can help accommodate hip limitations.
3. Balance Disorders
Those with balance disorders or vertigo should approach tree pose with care. Using a wall or a sturdy object for support can provide additional stability and prevent falls.
4. High Blood Pressure
While tree pose is generally safe, individuals with high blood pressure should avoid raising their arms overhead, as this can increase blood pressure. Instead, keep your hands in a prayer position at your chest.
5. Fatigue or Dizziness
If you are feeling fatigued or dizzy, it may be best to skip tree pose or practice it with modifications. Listen to your body and prioritize rest and recovery when needed.
Always consult with a healthcare professional or a certified yoga instructor if you have any concerns about practicing Tree Pose, especially if you have pre-existing health conditions. Remember, yoga is a personal journey, and it’s important to honor your body’s unique needs and limitations. With mindful practice and appropriate modifications, you can safely enjoy the benefits of Tree Pose.
How to Do Tree Pose: Step-by-Step Guide
Embarking on the journey to master tree pose is both exciting and rewarding. Follow these detailed steps to ensure proper alignment and balance as you cultivate strength and focus:
Step 1: Find Your Foundation
- Begin in Mountain Pose (Tadasana): Stand tall with your feet hip-width apart, arms relaxed by your sides, and weight evenly distributed across both feet.
- Ground Yourself: Feel the connection between your feet and the earth. Engage your leg muscles and draw your kneecaps upward to activate your thighs.
Step 2: Shift Your Weight
- Transfer Weight: Gradually shift your weight onto your right foot, ensuring it remains firmly planted and stable.
- Engage Your Core: Draw your navel toward your spine to activate your core muscles, providing additional stability.
Step 3: Position Your Left Foot
- Lift Your Left Foot: Slowly lift your left foot off the ground, bending the knee and turning it outward.
- Place Your Foot: Position the sole of your left foot against the inner right thigh, calf, or ankle—avoiding the knee joint. Choose a placement that feels comfortable and stable.
Step 4: Find Your Balance
- Focus Your Gaze: Fix your eyes on a stationary point in front of you to help maintain balance.
- Adjust Your Posture: Ensure your hips are level and facing forward. Lengthen your spine and relax your shoulders away from your ears.
Step 5: Engage Your Arms
- Choose an Arm Position: Bring your palms together in a prayer position at your chest (Anjali Mudra) or extend your arms overhead, reaching toward the sky.
- Maintain Alignment: Keep your shoulders relaxed and your arms active, whether they are at your chest or overhead.
Step 6: Hold the Pose
- Breathe Deeply: Take slow, deep breaths, maintaining your focus and balance.
- Stay Present: Hold the pose for 20 to 30 seconds, or as long as you feel comfortable, gradually increasing the duration with practice.
Step 7: Release and Repeat
- Gently Lower Your Left Foot: Return your left foot to the ground and return to mountain pose.
- Repeat on the Other Side: Shift your weight to your left foot and repeat the steps with your right foot.
Tips for Success
- Use Support if Needed: If you’re new to Tree Pose or working on your balance, practice near a wall or chair for added support.
- Modify as Necessary: Adjust the position of your lifted foot to suit your comfort and flexibility level.
- Practice Patience: Balance improves with practice, so be patient and kind to yourself as you progress.
Watch the following video by Kino MacGregor for more tips about doing this foundational pose.
By following these steps and embracing the practice with an open heart, you’ll find yourself growing more confident and stable in Tree Pose. Remember, each practice is an opportunity to deepen your connection with your body and mind, fostering growth and resilience.


