Modified padangusthasana, also known as the modified big toe pose, is a popular yoga asana that offers numerous benefits for the mind and body. This gentle yet powerful posture provides a deep stretch to the hamstrings, calves, and lower back, promoting flexibility and strength. In this blog post, we will explore the steps to perform modified padangusthasana correctly, along with its variations and modifications. Whether you are a beginner or an experienced yogi, this guide will help you unlock the many physical and mental advantages of this beautiful pose. So, grab your yoga mat, and let’s dive into the world of modified padangusthasana!
Benefits of Modified Padangusthasana
Modified padangusthasana, or the modified big toe pose, offers a wide range of benefits that contribute to overall well-being. When practiced regularly, this asana can have a positive impact on both the body and mind. Here are some key benefits of modified padangusthasana:
- Stretching and Flexibility: One of the primary benefits of modified padangusthasana is its ability to stretch the hamstrings, calves, and lower back. By gently lengthening these muscle groups, this asana helps improve flexibility and range of motion in the legs and spine.
- Improved Posture: The practice of modified padangusthasana helps to align the spine and improves posture. It strengthens the muscles in the back, core, and legs, promoting an upright and balanced body position. As a result, regular practice can alleviate back pain and prevent postural imbalances.
- Calms the Mind: As with any yoga asana, modified padangusthasana emphasizes deep breathing and mindful awareness. This helps to calm the mind and reduce stress and anxiety. The focus on the breath encourages relaxation and enables practitioners to experience a sense of inner peace and tranquility.
- Increased Blood Circulation: The forward fold aspect of modified padangusthasana stimulates blood circulation to the brain, promoting mental clarity and alertness. Improved blood flow also benefits the entire body, nourishing organs, tissues, and cells, and aiding in detoxification.
- Relieves Digestive Issues: The compressive nature of modified padangusthasana stimulates the abdominal organs, including the digestive system. Regular practice assists in improving digestion, relieving constipation, and reducing bloating.
- Tones the Legs: This asana targets the muscles in the legs, particularly the hamstrings and calves, helping to tone and strengthen them. It also engages the quadriceps and glutes, contributing to overall leg muscle development and stability.
It is important to note that while modified padangusthasana offers numerous benefits, it is essential to practice with proper alignment and modifications tailored to individual needs.
Contraindications for Modified Padangusthasana
While modified padangusthasana provides numerous benefits, there are certain contraindications and precautions to be aware of. It’s important to consider these before attempting this pose:
- Back Injuries: If you have a back injury or any existing lower back issues, it is advisable to practice with caution. This pose involves forward folding, which can put strain on the lower back. Consult with a qualified yoga instructor or healthcare professional for appropriate modifications or alternative poses.
- Hamstring Injuries: Individuals with acute or chronic hamstring injuries should approach modified padangusthasana with caution. The intense stretching of the hamstrings in this pose may aggravate the injury. It is essential to listen to your body’s signals and practice within your comfortable range of motion.
- High Blood Pressure: People with high blood pressure should be cautious with forward folding poses, including modified padangusthasana. The forward bend may increase blood pressure temporarily. Individuals with hypertension should practice this asana under the guidance of an experienced yoga teacher and avoid excessive strain.
- Herniated Disc: Those with a herniated disc or disc-related issues in the spine should avoid or modify this pose. The forward fold puts pressure on the spine, which may exacerbate the condition. Seek guidance from a healthcare professional or experienced yoga teacher for suitable modifications or alternative poses.
- Pregnancy: It is advisable for pregnant individuals to avoid deep forward folds, including modified padangusthasana. The pressure exerted on the abdomen can be discomforting and potentially harmful to the baby. Pregnant individuals should consult with their healthcare provider and modify their yoga practice accordingly.
- Recent Surgery or Injury: If you have had recent surgery or an injury, especially in the legs, hips, or lower back, it is essential to seek guidance from a healthcare professional or physical therapist before attempting modified padangusthasana. They can provide appropriate modifications or alternative poses to support your recovery process.
Always remember to listen to your body and be mindful of any discomfort or pain during the practice of modified padangusthasana or any other yoga pose. If you experience any unusual sensations or pain, it’s best to stop and seek professional guidance. Your safety and well-being should be the top priority during your yoga practice.
Step-by-Step How to do Modified Padangusthasana
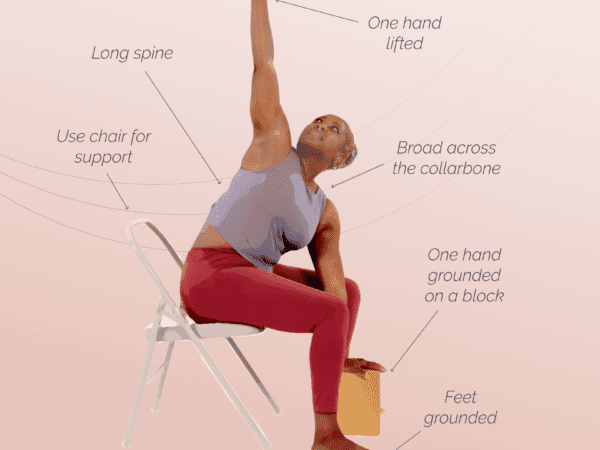
Modified padangusthasana can be adapted for a chair yoga practice, making it accessible and safe for people with limited ranges of motion and who have difficulty balancing. Here are step-by-step instructions on how to perform modified padangusthasana in a chair. Follow this tutorial for help doing this classic pose:
- Sit on a stable chair with both feet flat on the floor. Keep your spine upright and your shoulders relaxed.
- Place your hands on your thighs, palms facing down. Take a few deep breaths, allowing yourself to feel centered and grounded.
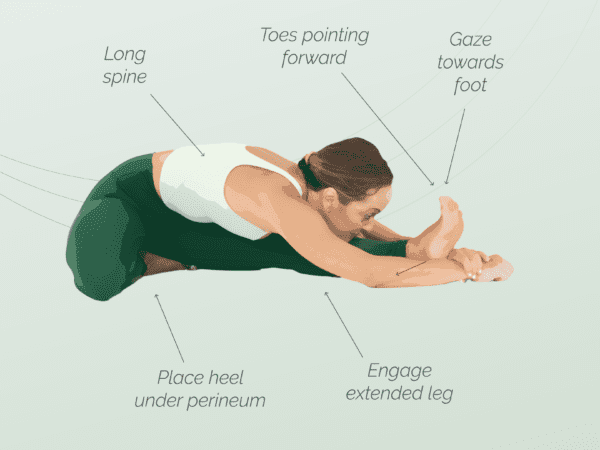
- Inhale deeply and as you exhale, begin to bend forward from your hips. Keep your spine long and avoid rounding your back. Imagine reaching your chest forward.
- Rest your torso on your thighs and hold your big toes.
- Keep breathing steadily as you hold the pose for about 30 seconds to 1 minute, or as long as feels comfortable. Allow your breath to help you deepen into the stretch with each exhale.
- To come out of the pose, slowly release the stretch by slowly coming back to an upright position. Take a moment to notice how your body feels before repeating the pose on the other side.
Tips:
- If you have difficulty reaching your foot or experience discomfort in your lower back, reach to your shins or knees instead.
- Make sure the chair you are using is stable and secure. Avoid chairs with wheels or those that are unsteady.
- If you feel like you’re ready to try this pose while standing, using the support of a wall will help you maintain balance.
Remember, it’s important to listen to your body and only go as far as your comfort allows. Each individual’s range of motion may vary, so practice the modified pose with gentle and gradual movements. If you have any pre-existing conditions or concerns, it’s recommended to consult with a qualified yoga instructor or healthcare professional before attempting any new exercise or yoga practice.
Are you looking for more guidance on your yoga journey? Sign up for Omstars to get access to thousands of yoga classes in the comfort of your own home. Click here to start your subscription.


